วันอาทิตย์ที่ 1 กันยายน พ.ศ. 2556

create a blog. It's free

create a blog. It's free


2. After entering your Gmail with its password, the "Welcome Screen" of Blogger appears and confirms that you have just passed its regulation. Now you can either add your profile details or skip to the next step.
ถ้า กรอกถูกต้อง นักเรียนก็จะมาพบกับหน้าจอ ตอบรับของ blogger ตรงนี้นักเรียนอาจจะเพิ่มรายละเอียดเกี่ยวกับตัวเองลงไปใน Profile ก็ได้ หรืออาจจะข้ามไปก็ได้ 

You can give more details of your profile or you can skip to the next step by clicking the orange button.

3. See "New Blog" and click, wow, to create your blog any way!!!
หลังจากนั้นก็จะเข้าสู่หน้าจอที่บอกว่า ให้นักเรียนสร้างบล็อกได้ ก็ทำง่ายๆ เพียงแค่คลิกที่ "บล็อกใหม่" 


4. Yeah!, you have to fill some fields related to your new blog e.g. title,address and template. But you can pass this task easily. Or you can skip it.(Because you can change these options any time).
หลัง จากที่คลิกบล็อกใหม่ นักเรียนก็จะมาพบกับหน้าจอที่เขียนว่า รายการบล็อก นักเรียนก็จะต้องกรอกที่อยู่ของบล็อก ซึ่งนักเรียนก็กรอกตามที่ครูกำหนด คือเลขประจำตัว 4 หลัก ตามด้วยตัวอักษรของชื่อ ในภาพเป็นบล็อกของครูที่ทำเป็นตัวอย่าง (ของนักเรียนต้องดูภาพล่างถัดจากภาพนี้) 


===> เมื่อกรอกถูกแล้วก็ยืนยันว่า สร้างบล็อก


5. You can select "Settings Option" to change the style/template of your blog anyway and anytime.
นักเรียนสามารถเปลี่ยนแปลงสิ่งที่กำหนดไว้ของบล็อกได้ โดยไปเลือกที่การตั้งค่า
หรือเปลี่ยนรูปแบบ/แม่แบบ ก็ยังได้ (ดังรูปข้างล่างนี้)


6. Well, you can start your post now. See the sample below.
ลงมือสร้างบทความ (POST) ดังตัวอย่าง หลังจากนั้นก็เผยแพร่ (Publish)


7. When you select the option "View Blog", your blog with your post will appears like the following. 

เมื่อเราเรียกดูบล็อก (View blog) ก็จะมีหน้าตาทำนองนี้ ดังตัวอย่าง


======================================================================

There are any students complain that they have no Internet connection at home, so they can never create their blog. The teacher realizes the problems. But the cops (the fans of Liverpool Football Club) say, "You'll never walk alone", be sure you still have friends who can help you. Look for a star that guides you to the way out.

มี นักเรียนส่วนหนึ่งมาปรับทุกข์ว่า ที่บ้านไม่มีอินเทอร์เน็ตใช้ เลยไม่อาจจะสร้างบล็อกได้ เรื่องนี้ครูผู้สอนเองก็ตระหนักอยู่แล้ว แต่ช้าก่อน.... สาวกหงส์แดง หรือพวกเดอะค็อป (แฟนคลับสโมสรลิเวอร์พูล) บอกเป็นเสียงเดียวกันว่า "คุณ..จะไม่มีวันได้เดินเผชิญเหตุคนเดียว.." (เพราะพวกเราจะเดินไปพร้อมๆ กัน ช่วยเหลือกัน ไม่ทิ้งกัน..น่ะสิ) ... เพราะฉนั้นนักเรียนที่ไม่มีอินเทอร์เน็ตที่บ้าน... ก็ไม่ใช่ประเด็นที่เป็นปัญหา... เพราะว่า เราก็ยังมีเพื่อนๆ.. เพื่อนๆ ที่พร้อมจะช่วยเหลือเรา ...เพียงแต่เราต้องหา... ดาวดวงนั้น (เพื่อนสักคน) ให้เจอ ดวงดาวที่จะช่วยนำเราไปสู่ทางออก.. 

======================================================================

YOU ARE EXPECTED TO START CREATING YOUR BLOG NOW. 
Please don't say never again, do you?


ก็ หวังว่า นักเรียนคงจะสามารถสร้างบล็อกเบื้องต้นได้แล้ว ขอเพียงแต่ว่า ต้องรีบไปทดลองทำทันที ถ้านักเรียนมัวผลัดวันประกันพรุ่ง ครูรัรองว่า นักเรียนก็จะยังทำไม่ได้ หรือ "ไม่ได้ทำ"

How to blogger

How to blogger

How to blogger

สร้างบล็อกอย่างไร How to Create Your Blog with www.blogger.com
Teacher Phaitoon Yaemprasuan : occupatech@gmail.com

http://picta55.blogspot.com


1. After you had signed in Google Mail Service and then you had your own Gmail, well, you are now the one who can ask for your blog creation with www.blogger.com using your Gmail.

หลัง จากที่นักเรียนได้ไปลงทะเบียนขอมี Gmail account กับ Google แล้ว นักเรียนก็สามารถเข้าไปขอสร้าง Blog กับ blogger.com โดยใช้ Gmail address ที่นักเรียนขอไว้แล้วนั่นเอง [Gmail และ Blogger เป็นของ Google เหมือนกัน จึงไปกันได้ด้วยดี)

Folder and Printer Sharing การแชร์โฟลเดอร์/เครื่องพิมพ์

Folder and Printer Sharing การแชร์โฟลเดอร์/เครื่องพิมพ์

Folder and Printer Sharing การแชร์โฟลเดอร์/เครื่องพิมพ์

Folder and Printer Sharing การแชร์โฟลเดอร์/เครื่องพิมพ์

โดย occupatech@gmail.com
The Atmosphere of My 2003 Computer Class at 4th Floor of Building1.
They were energetic and very nice schoolkids I have ever experienced.

บรรยากาศห้องเรียนคอมพิวเตอร์ 2546 สมัยยังอยู่ชั้น 4 อาคาร 1 
พวกเขาเป็นเด็กนักเรียนที่ขยันขันแข็ง ตั้งใจเรียน และเป็นเด็กดีมากที่สุดรุ่นหนึ่งเท่าที่ครูเคยเจอ

All of us use Windows7 as the operating software, and our computers are connected together within the workgroup of the LAN (local area network). So we should gain the benefit of its sharing capability. Here we go!
ตอนนี้พวกเราล้วนแล้วแต่ใช้ Windows7 เป็นซอฟต์แวร์ระบบปฏิบัติการ (ในห้องเรียน และที่บ้านด้วย) และเครื่องของพวกเราก็เชื่อมต่อกันเป็นเวิร์กกรุ๊ปในระบบแลน ดังนั้นเราก็น่าจะใช้ความสามารถในการแชร์ทรัพยากรระหว่างกันได้ ลองดูกัน

1. FOLDER SHARING
การแชร์โฟลเดอร์

Be sure we have to specify what folder that we want to share? 
ต้องระบุโฟลเดอร์ที่ต้องการแชร์


"BOOKS" is the folder of us to be shared.
ฟลเดอร์ "BOOKS" คือโฟลเดอร์ที่เราอยากแชร์

Make a right clicking with the folder, the dialogue box appears. Select the "Sharing" tab and the "Advanced Sharing" button
คลิกขวาที่โฟลเดอร์ กรอบโต้ตอบจะปรากฏขึ้น เราก็เลือกแท็บ 
"Sharing" และปุ่ม 
"Advanced Sharing"


Now the folder has never been shared yet (Not Shared)
ตอนนี้โฟลเดอร์นี้มีสถานภาพไม่ได้ถูกแชร์ไว้

Properties window of the folder appears and we should select to share it with others. Now we can see the maximum number of users to simultaneously enter to the folder is 20. Then we can click on the "Permission" button.
จะ ปรากฏหน้าต่างพรอพเพอร์ตีส์ (คุณสมบัติ) ของโฟลเดอร์นี้ขึ้นมา และเราก็ต้องเลือกว่าจะแชร์กัน และจะเห็นว่า เพื่อนๆ จะเชื่อมต่อเข้ามาใช้โฟลเดอร์ของเราพร้อมกันได้เต็มที่ 20 เครื่อง แค่นั้น ต่อมาก็เลือกคลิกปุ่ม "Permission"

Tick the check-box, and we can change the share name or ignore it.
ติ๊กเลือกว่าจะแชร์ จะเปลี่ยน/หรือไม่เปลี่ยนชื่อที่จะแชร์ก็ได้

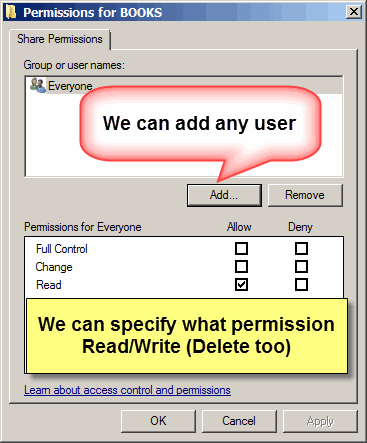
After clicking on the permission button, the Permissions window shows up, you can add any user e.g. "student" and you can change the permission type of the user.
หลังจากคลิกปุ่ม permission จะมีหน้าต่างโผล่มาให้เราปรับเปลี่ยนตามความต้องการ

We can add user/ specify his permission level.
เราสามารถเพิ่มยูสเซอร์ / ระบุระดับการอนุญาตใช้งานโฟลเดอร์ของเราแก่เขา

Finally click on the "Apply" button, the folder now has been shared. 
เมื่อเราคลิกปุ่ม "Apply" โฟลเดอร์ของเราก็ได้รับการแบ่งปันให้ใช้ร่วมกันได้ในเครือข่ายแล้ว
Well, our folder has been shared.
Folder ของเราได้รับการแชร์กันใช้เรียบร้อยแล้ว

Sample Special
ตัวอย่าง


This is from my computer (Its hostname is "ALPHA00".), when I click on the "Network" (at the left pane of Windows7 "Computer explorer" ) some computer hostnames appears. Yes, I want to randomly select any hostname. If the target of mine is "KACHATUCH", yes I would make a double-click on it.
นี่ เป็นคอมพิวเตอร์ของครูที่ห้องพักครู (โฮสต์เนมว่า ALPHA00) เมื่อครูคลิกเลือก Network (อยู่ตรงแถบซ้ายของหน้าต่าง Computer explorer ของ Windows7 ก็จะปรากฏโฮสต์เนมต่างๆ ในเครือข่าย แน่นอนว่า ครูก็คงต้องสุ่มเลือกเข้าไปใช้เครื่องใดสักเครื่อง ที่ครูเล็งไว้ก็คือเครื่องที่มีโฮสต์เนมว่า Kachatuch
My Target Hostname is "KACHATUCH"
เครื่องที่ครูเล็งไว้คือ โฮสต์เนมที่ชื่อว่า Kachatuch

The shared folders of the hostname will be appeared. Then we can do a random selection and we can find any other subfolders that we can select to use.
ตอน นี้ก็จะเห็นโฟลเดอร์ที่โฮสต์เนม Kachatuch เราก็คงต้องสุ่มเลือกโฟลเดอร์ แล้วเราก็จะเห็นโฟลเดอร์ย่อยๆ ที่เราสามารถจะเลือกเข้าไปใช้ได้
The Shared Folders of "Kachatuch" appears, any folder could be selected.
If any shared folder had been selected its subfolders would be revealed. 

แชร์โฟลเดอร์ของโฮสต์เนม "Kachatuch" ก็จะปรากฏขึ้นมาให้เห็น เราสามารถเลือกโฟลเดอร์ไดก็ได้
ถ้าแชร์โฟลเดอร์ใดถูกเลือกเข้าใช้ โฟลเดอร์ย่อยๆ ก็จะได้รับการเปิดตัวออกมาให้เห็นฝเลือกใช้ได้


2. PRINTER SHARING
การแชร์พรินเตอร์


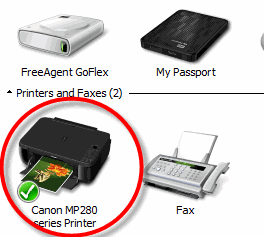
Click the "Start button" of Windows7 desktop, the pop-up menu appears, then select "Devices and Printers", the target printer of us will be appeared.
จากปุ่ม Start ของ Windows7 เราก็เลือก "Devices and Printers" ก็จะเจอพรินเตอร์ที่เราอยากจะแชร์กันใช้
Select the printer

Make a right click on the printer icon, the select menu will show up, then select "Printers properties" option. Then we can operate sharing easily.
คลิ กขวาที่รูปพรินเตอร์ จะมีป็อปอัพเมนูโผล่ขึ้นมา ให้เราเลือก "Printers properties" ต่อจากนี้ เราก็คงจะปฏิบัติการแชร์พรินเตอร์ได้ไม่ยากแล้ว...
Select : Printer Properties

Click on the "Sharing tab", and we can rename the sharing printer.
เลือกแท็บ Sharing และสามารถเปลี่ยนชื่อพรินเตอร์ที่กำลังจะแชร์ได้ด้วย
Select the Sharing Tab

Facebook Head Office สำนักงานใหญ่เฟสบุ๊ก

Facebook Head Office สำนักงานใหญ่เฟสบุ๊ก

                           Teacher :  Phaitoon  Yaemprasuan  : 
                                 http://picta55.blogspot.com 

 [SOURCE :  http://www.bigpicture.ru]

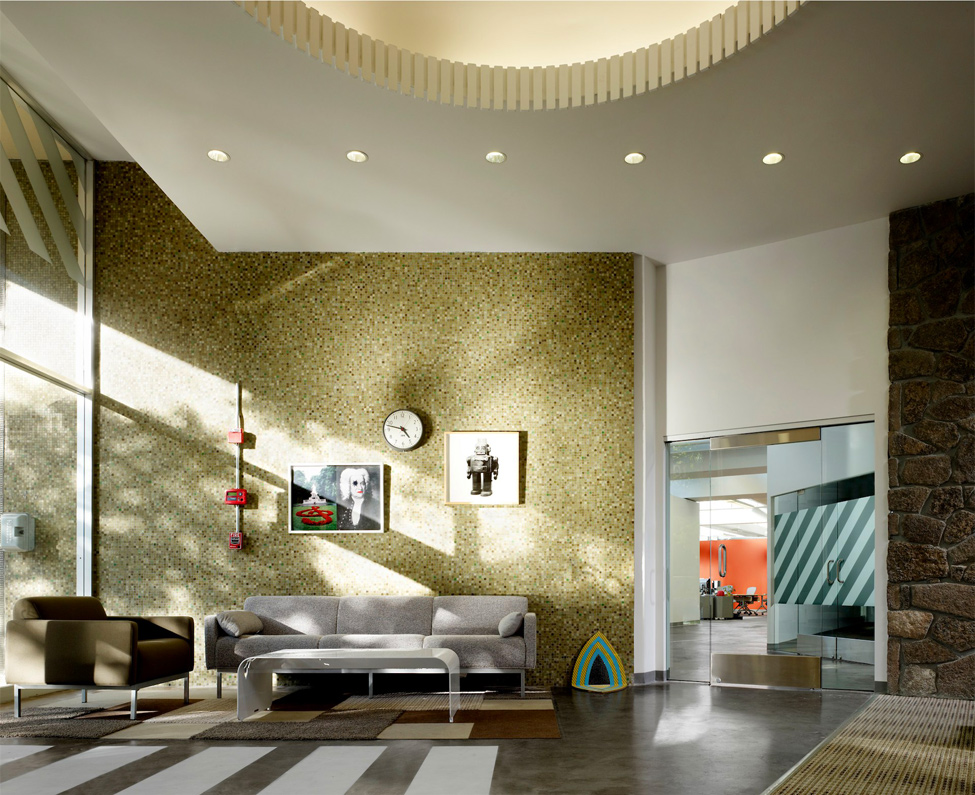
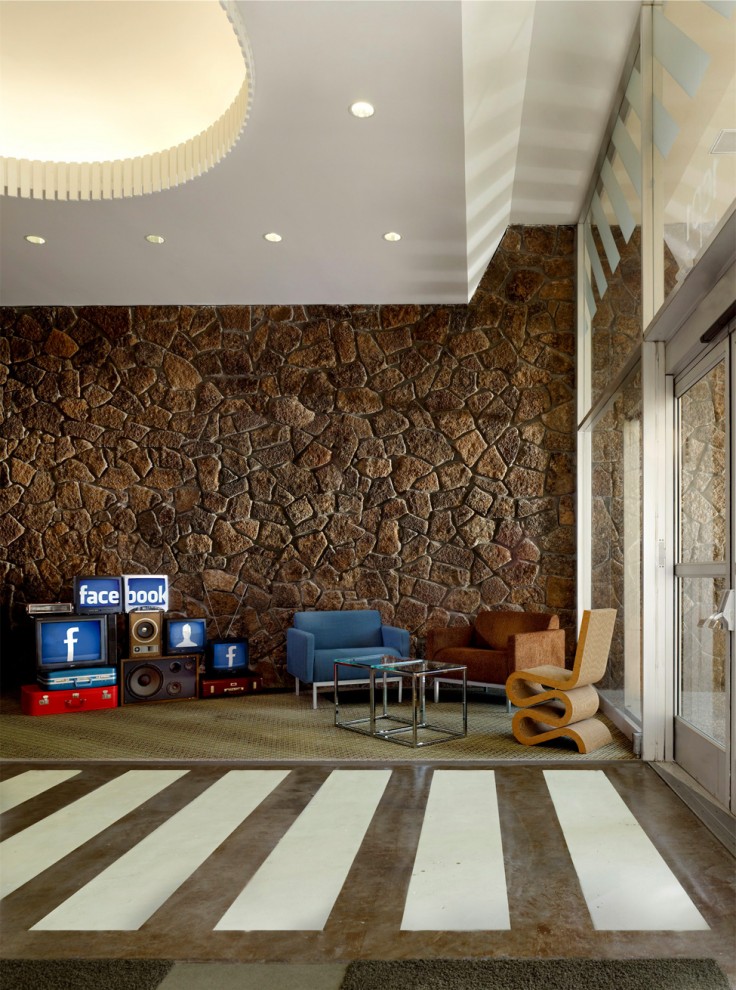
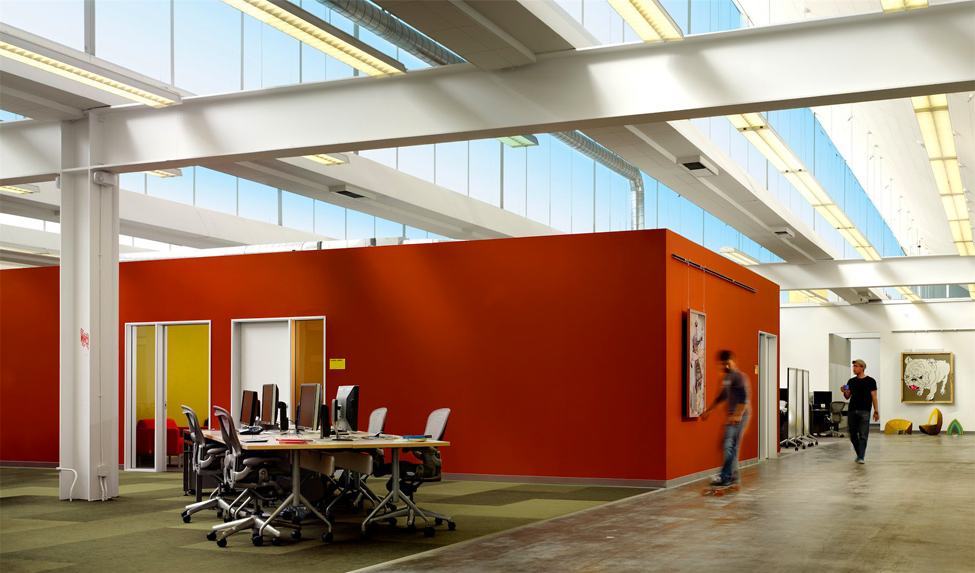
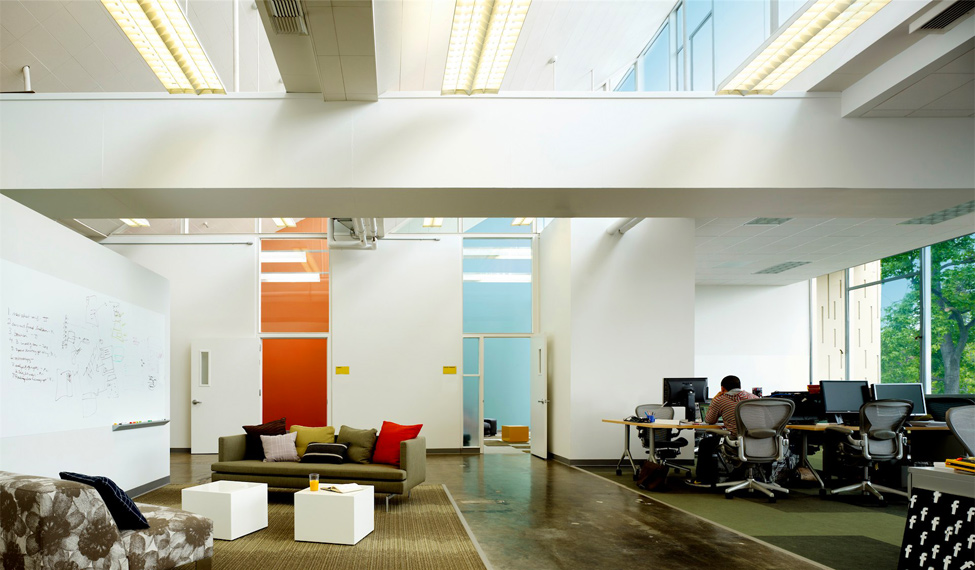
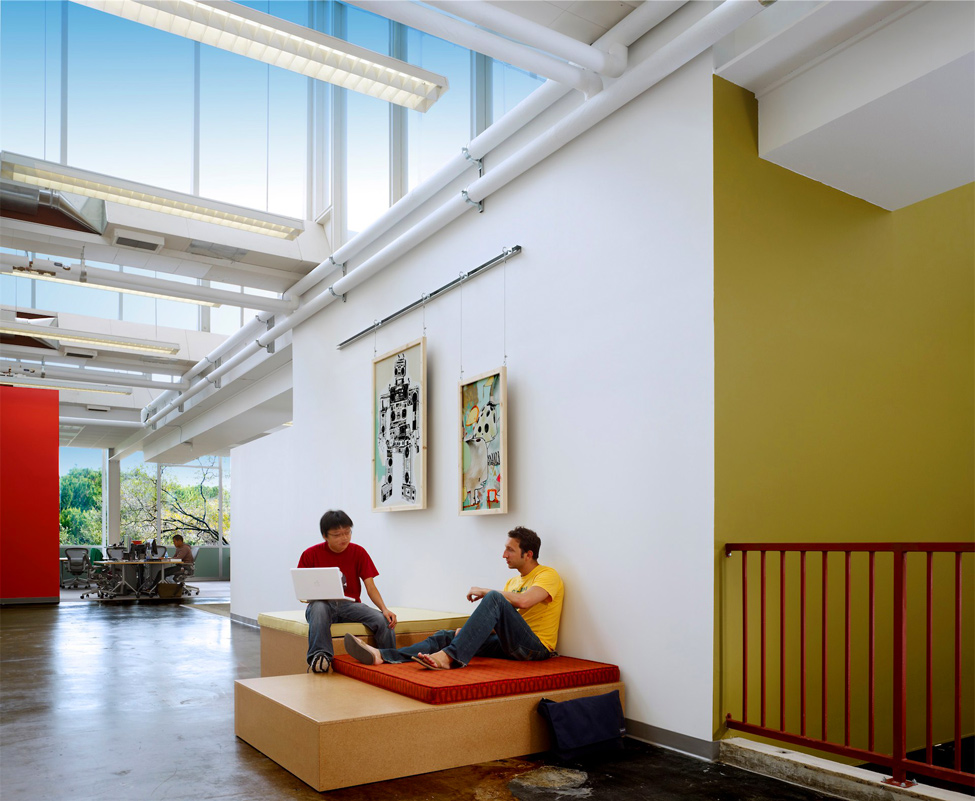
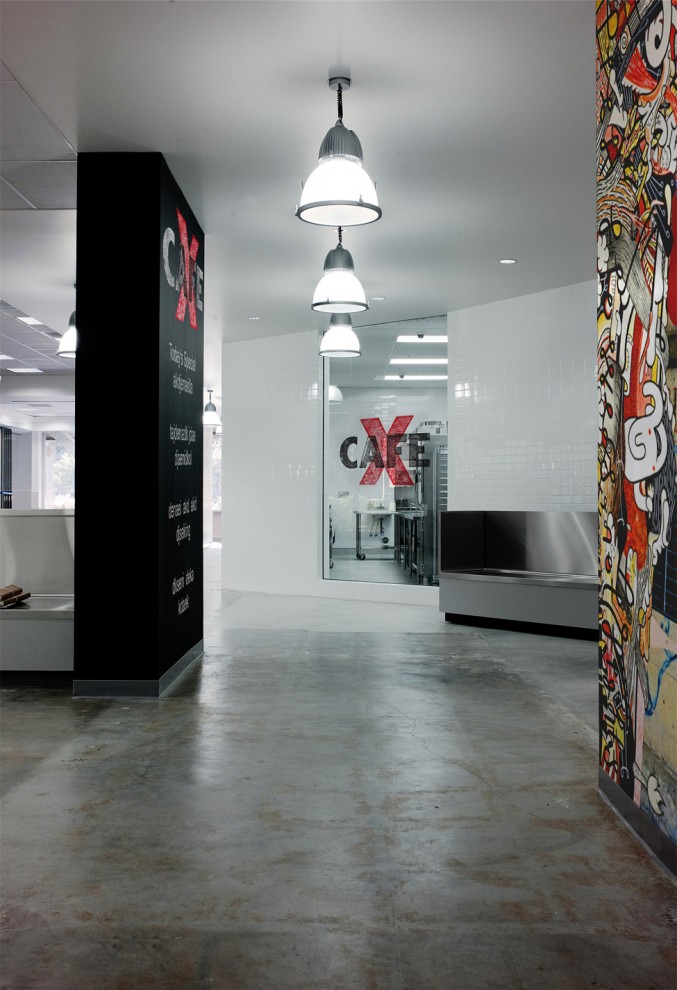
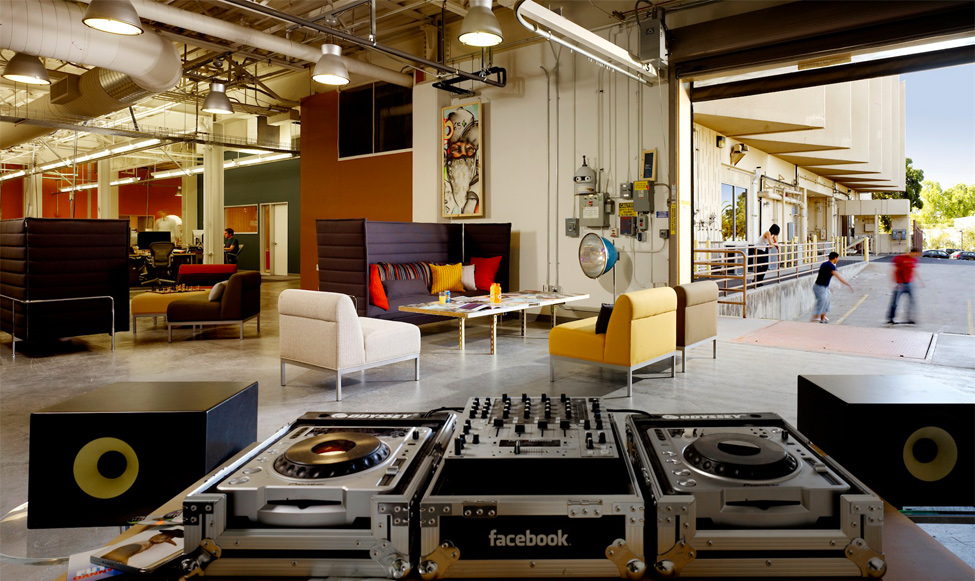
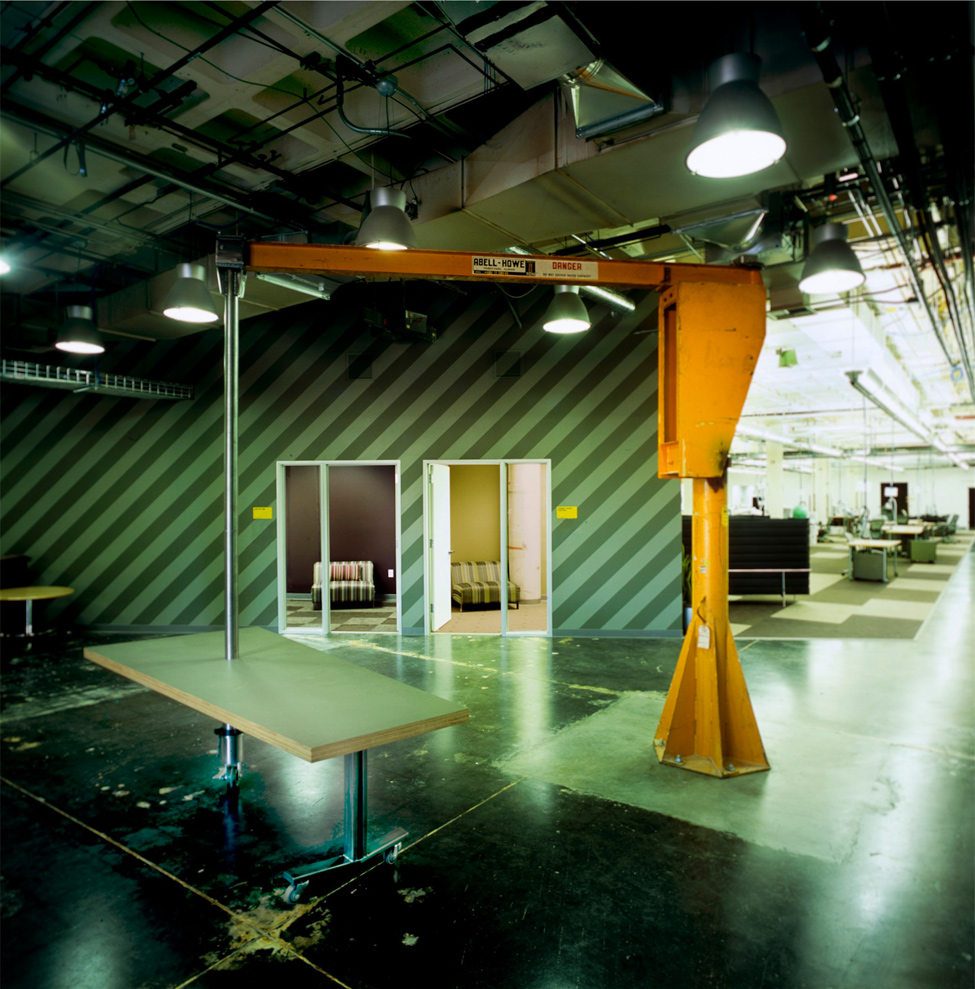
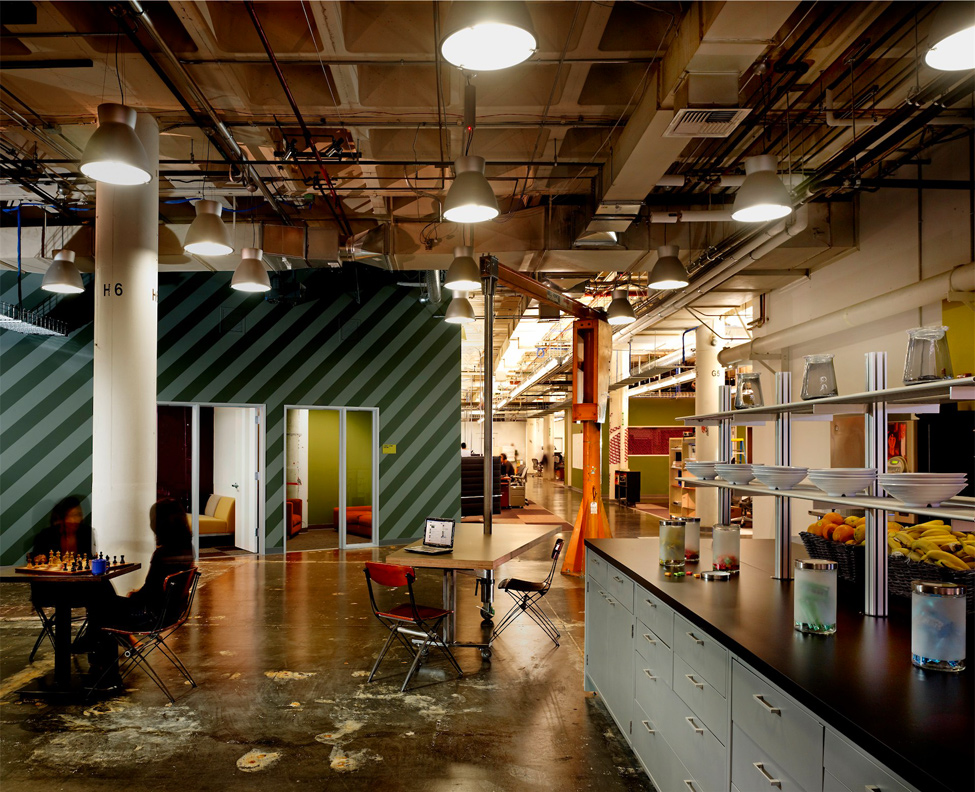
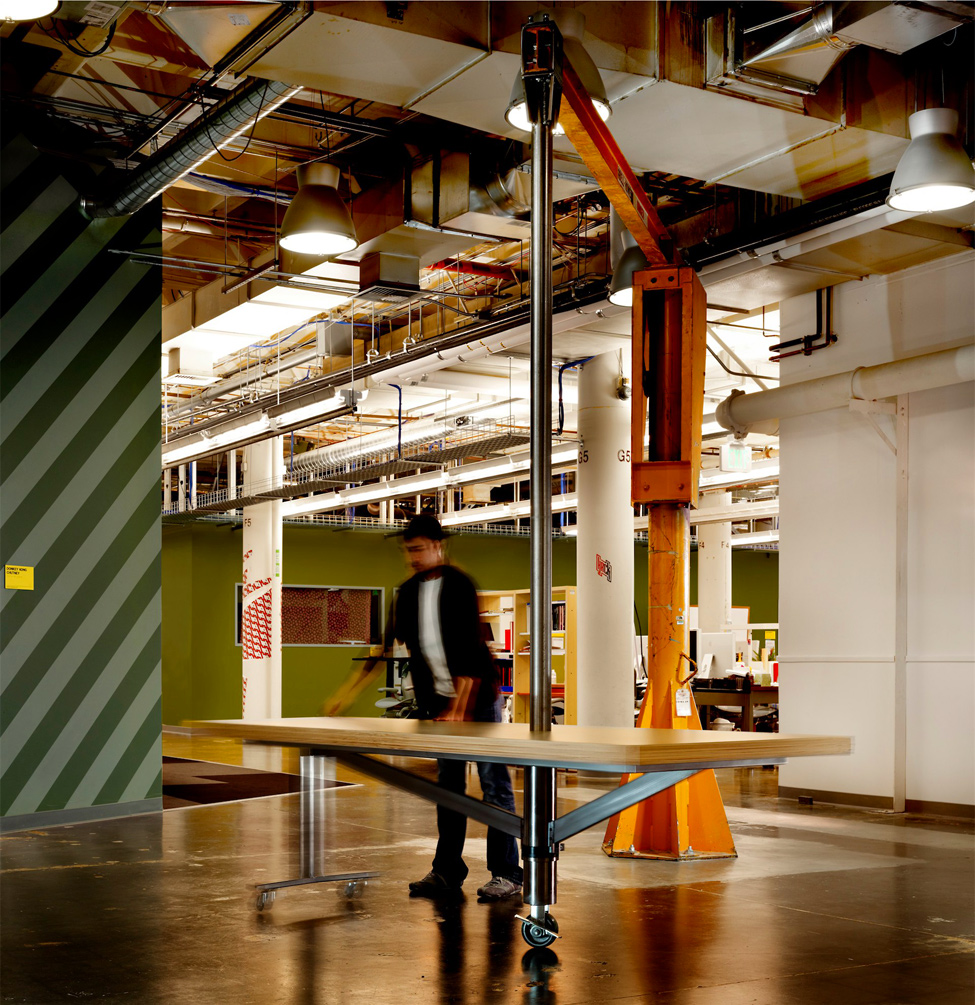
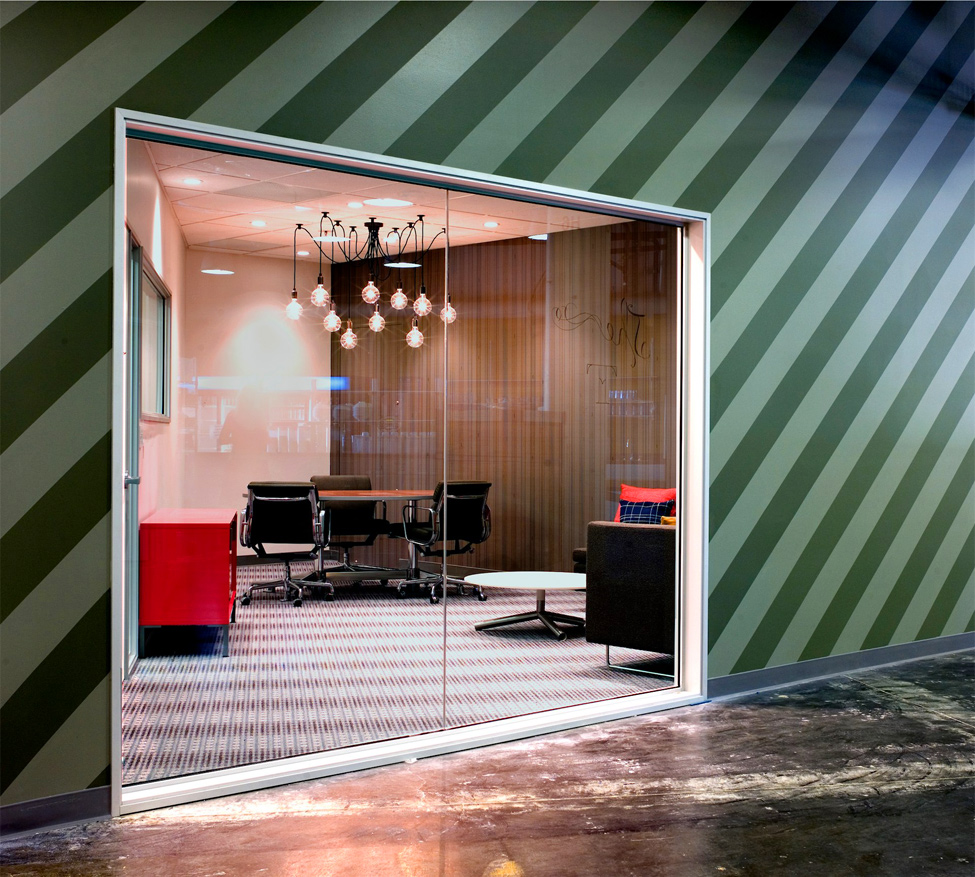
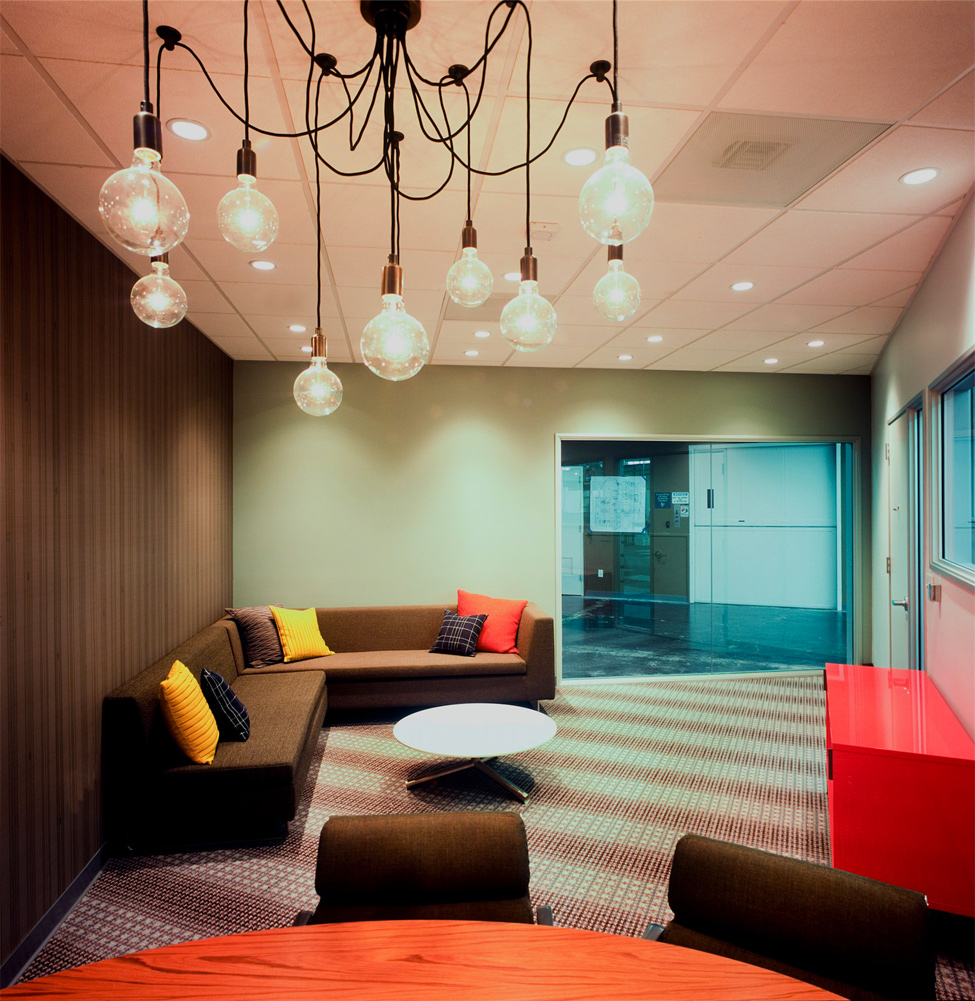
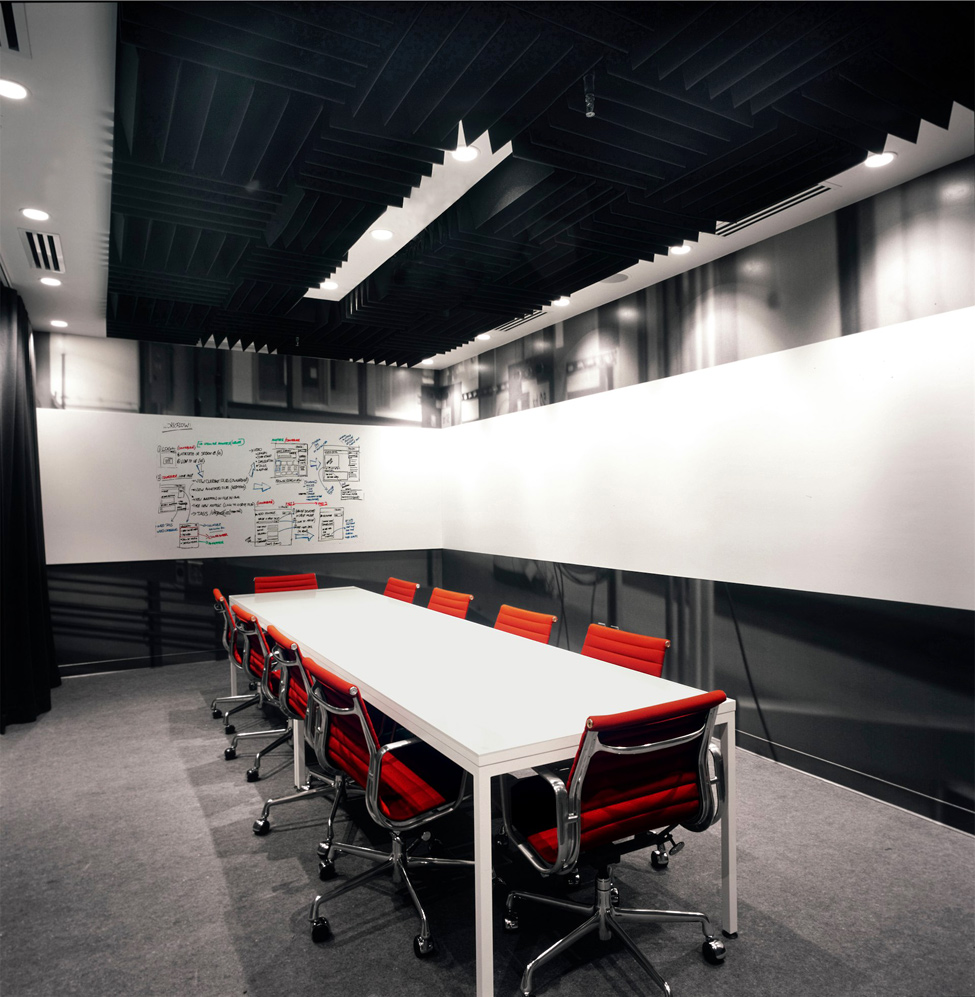
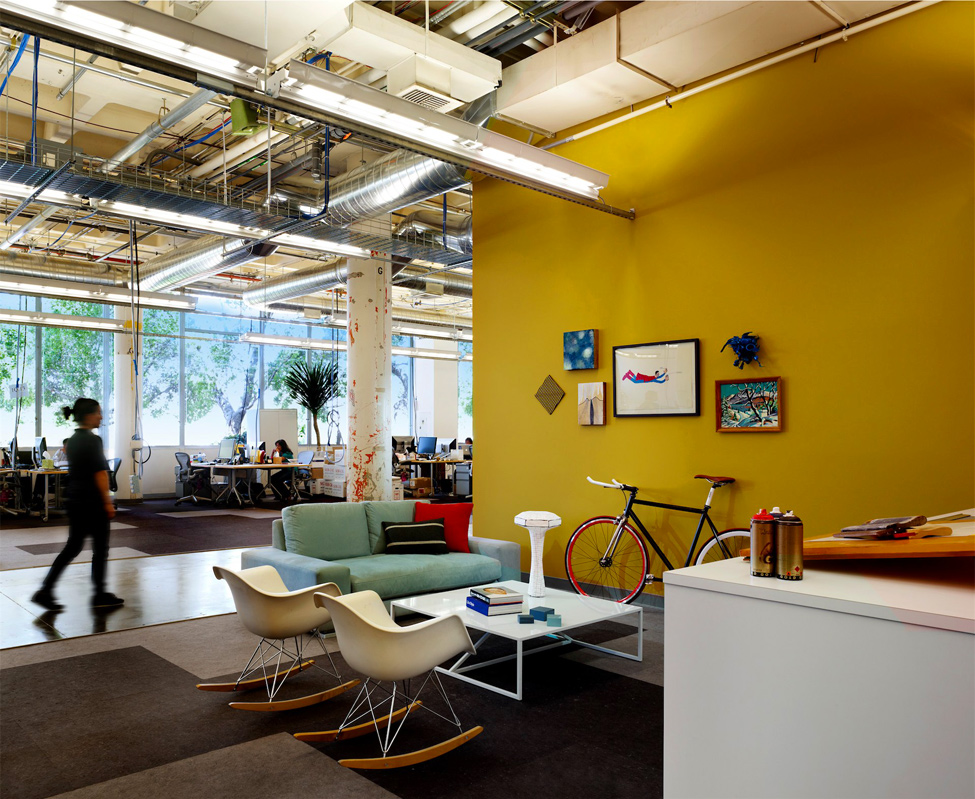
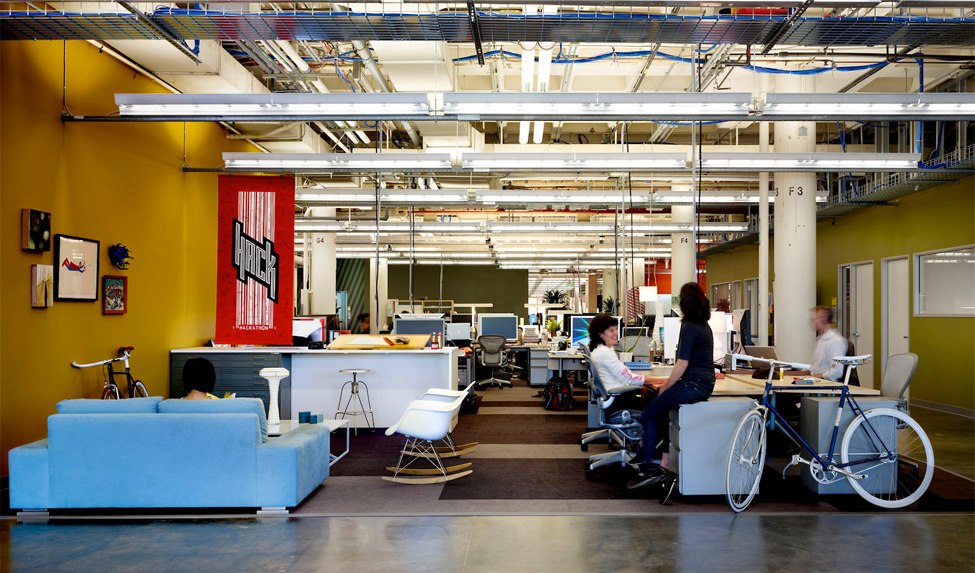
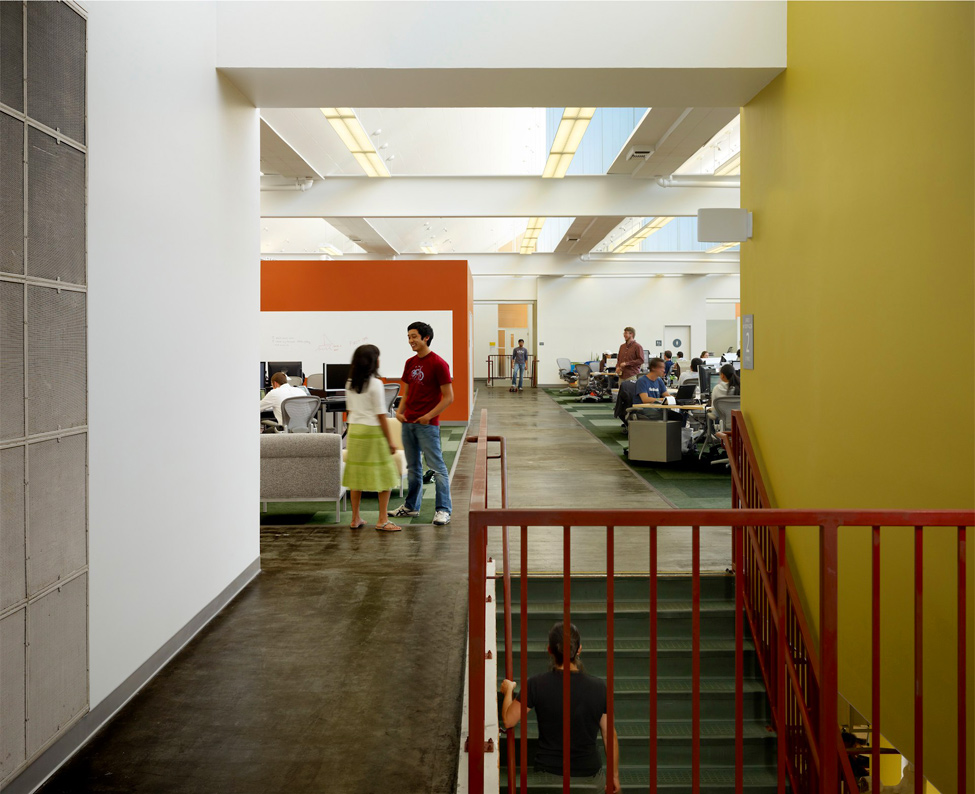
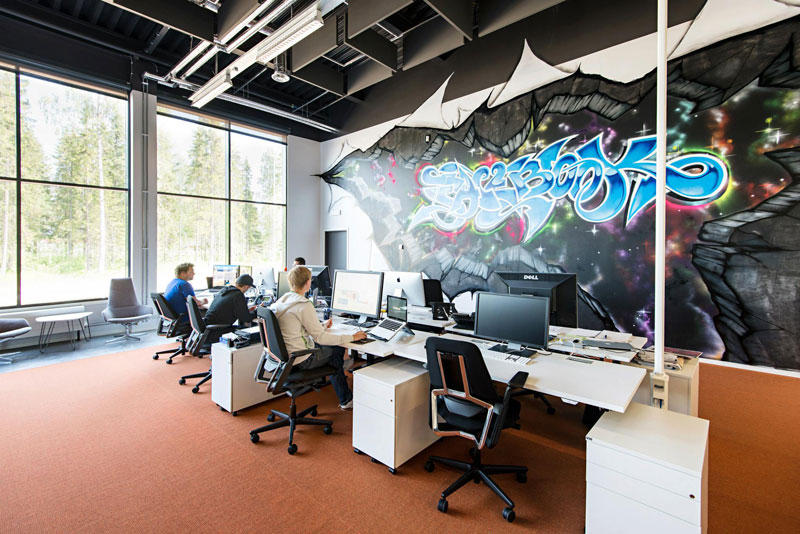
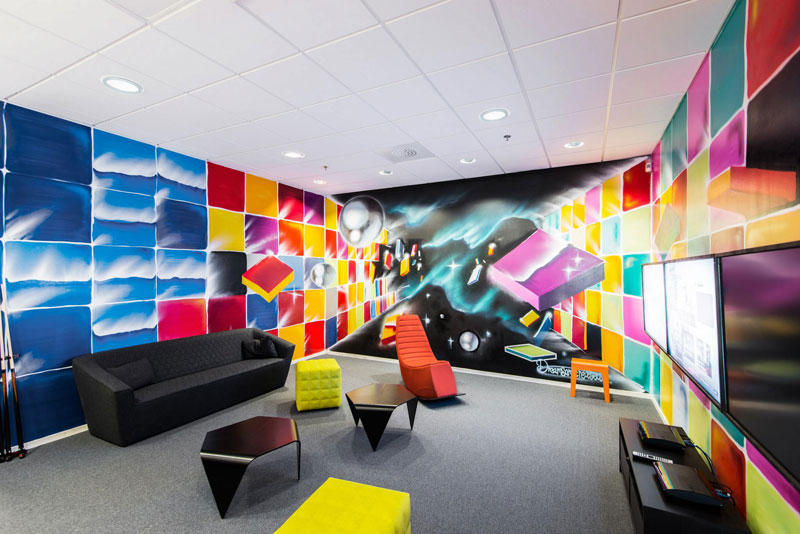
Well, let's look at the world class Information and Technology company, Facebook, that serves millions of people globally. But their Head office is so common like any other office.
เอา ล่ะ... นักเรียน  อยากให้เรามาดูบริษัทระดับโลกอย่าง Facebook ที่ให้บริการคนหลายล้านคนทั่วทั้งโลกาใบใหญ่นี้ ดูอ็อฟฟิศสำนักงานใหญ่ของพวกเขาสิ  ธรรมดาๆ บ้านๆ ซะจริงๆ (พวกฝรั่งเขาจะทำอะไรเรียบง่าย ไม่มากพิธี ไม่มีอะไรยุ่งยาก  แต่คุณภาพงานของพวกเขาที่ออกมานั้น สุดยอด)


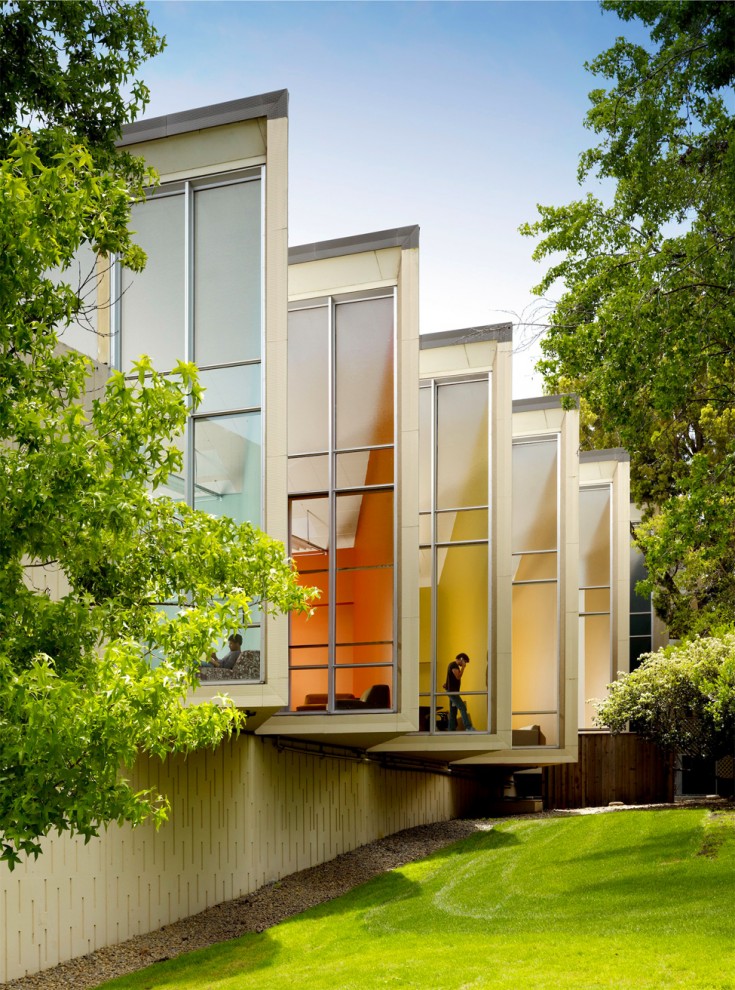
Head Office of Facebook is in Palo Alto, California. 
สำนักงานใหญ่เฟสบุ๊ก  ณ  เมืองพาโลอัลโต มลรัฐแคลิฟอร์เนีย

1309 Head office of Facebook 

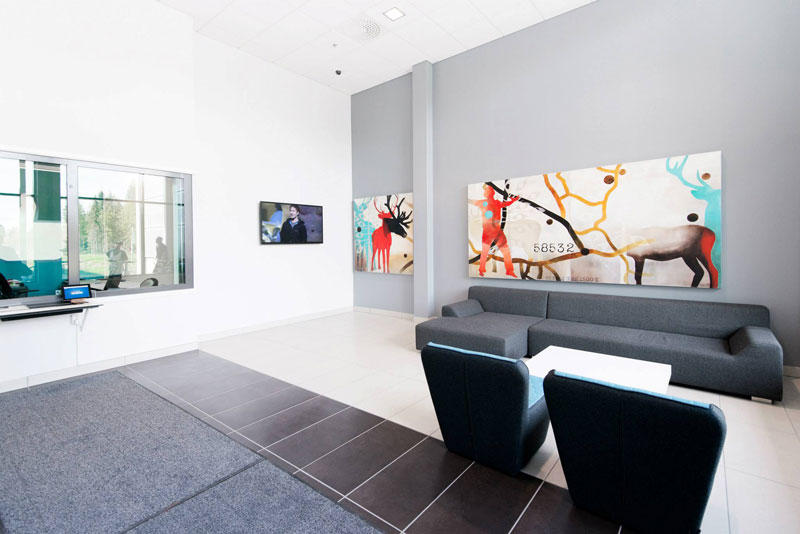
We can see that their office is not sophisticated but very common.
นักเรียนคงเห็นแล้วนะว่า ออฟฟิศใหญ่ของ  Facebook ก็ไม่ได้เลิศหรูสลับซับซ้อนอะไร แบบบ้านๆ ธรรมดาๆ (เพราะความ Hitech  จะไปอยู่ที่ Data Center แทน)

1309 Head office of Facebook
1.
2247 Head office of Facebook
2. 

3198 Head office of Facebook
3. 

4163 Head office of Facebook
4. 

5143 Head office of Facebook
5. 
6135 Head office of Facebook
6.
7133 Head office of Facebook
7. 
8120 Head office of Facebook
8. .
9104 Head office of Facebook
9. .
1097 Head office of Facebook
10.
11129 Head office of Facebook
11.
12107 Head office of Facebook
12.
1385 Head office of Facebook
13.
1482 Head office of Facebook
14.
1578 Head office of Facebook
15. Their office is like any common office, nothing is superb.
 ออฟฟิศดูธรรมดาๆ บ้านๆ เหมือนออฟฟิศทั่วไปที่ไหนๆ นั่นเอง  ไม่มีสิ่งไหนเลยที่เลิศลอยเกินเลย
1673 Head office of Facebook
16. The employees has never ware any uniform.
พนักงานของเขา ก็แต่งตัวแบบง่ายๆ บ้านๆ ไม่ต้องมีเครื่องแบบอะไรให้มากพิธี 
1767 Head office of Facebook
17.

วันพฤหัสบดีที่ 29 สิงหาคม พ.ศ. 2556

What/How to Study?


What/How to Study? เราจะเรียนอะไร/อย่างไร

  by  Teacher  Phaitoon  Yaemprasuan   
       occupatech@gmail.com 

      http://picta55.blogspot.com


Before we go for it, the ICT core course of Mattayom 2 (Grade 8) :  O22101 Occupation and Technology, we should know about its background.  Yes, what to be known is the Basic Education Core Curriculum B.E. 2551. The curriculum is the guide star that helps us what/how to manage the course and the class.  Because this is the core course , so the grade level indicators are what we have to follow.  There are four indicators (or learning outcomes).
                                                             
ก่อนที่นักเรียนจะเรียนวิชาคอมพิวเตอร์ (เทคโนโลยีสารสนเทศ) ในชั้นมัธยมศึกษาปีที่ 2 (เทียบได้กับ grade 8 ของสากล)  อยากให้เราลองมาทำความเข้าใจกับหลักสูตรที่เราใช้เป็นแนวในการจัดการเรียนการสอนกันเสียก่อน  ในที่นี้จะให้นักเรียนดูทั้งสองภาษาเลย   


Former Kanchanapisek students (academic year 2005) : the best ever kids I have known.


หลักสูตรแกนกลางการศึกษาขั้นพื้นฐาน 
พุทธศักราช  ๒๕๕๑
The Basic Education Core Curriculum
B.E. 2551 (A.D.2008)


กลุ่มสาระการเรียนรู้การงานอาชีพและเทคโนโลยี
Learning Area of Occupations and Technology


สาระที่ ๓         เทคโนโลยีสารสนเทศและการสื่อสาร       
Strand 3:    Information and Communication Technology

มาตรฐาน ง ๓.    เข้าใจ เห็นคุณค่า และใช้กระบวนการเทคโนโลยีสารสนเทศในการสืบค้นข้อมูล 
          การเรียนรู้  การสื่อสาร การแก้ปัญหาการทำ
งาน   
และอาชีพอย่างมีประสิทธิภาพ ประสิทธิผล และมีคุณธรรม                                                                                                                                                                                                                                     
    Standard O3.1:      Understanding, appreciation, and efficient, effective and ethical use of information technology processes in searching for data, communicating, problem–solving, working and livelihood


ตัวชี้วัดชั้นปี    Grade level indicators


ม. ๒   Grade 8
1. อธิบายหลักการเบื้องต้นของการสื่อสารข้อมูล  และเครือข่ายคอมพิวเตอร์
Explain basic principles of communicating data and computer networks
2. อธิบายหลักการ  และวิธีการแก้ปัญหาด้วยกระบวนการเทคโนโลยีสารสนเทศ
Explain principles and methods of problem-solving through information technology processes.
3. ค้นหาข้อมูล และติดต่อสื่อสารผ่านเครือข่ายคอมพิวเตอร์อย่างมีคุณธรรมและจริยธรรม
Search for data and communicate through computer networks morally and ethically.
4. ใช้ซอฟต์แวร์ในการทำงาน 
Use software for work


หัวใจสำคัญก็คือ Indicators (ตัวชี้วัด)  สำหรับวิชาพื้นฐาน หรือวิชาแกน (Core course)   ซึงจะถูกกำหนดมาแล้วจากส่วนกลาง คือ ทุกโรงเรียนจะต้องสอนตามแนวนี้  ห้ามสอนน้อยไปกว่าที่กำหนด (แต่สอนเกินได้ หากผู้เรียนมีความพร้อม)    วิชาคอมพิวเตอร์พื้นฐาน (ง22101 การงานอาชีพและเทคโนโลยี 2 ) เรียนสัปดาห์ละ 2 ชั่วโมง   แต่ถ้าเป็นวิชาเลือก หรือวิชาเสริม (Extended course) จะไม่เรียกว่า Indicators  แต่จะเรียกว่า Learning outcomes (ผลการเรียนรู้)     ในกรณีวิชาคอมพิวเตอร์ ครูผู้สอนจะเป็นผู้กำหนดเองตามความเหมาะสม   ซึ่งในปีการศึกษา 2556 ครูผู้สอนกำหนดให้นักเรียนสื่อสารผ่านเครือข่ายอินเทอร์เน็ต ในรูปของการสร้าง BLOG  โดยที่ วิชาเคอมพิวเตอร์เสริม (ง22230) เรียนสัปดาห์ละ 1 ชั่วโมง

Facebook Data Center


Facebook Data Center ศุนย์ข้อมูลของเฟซบุ๊ก

                  Teacher Phaitoon  Yaemprasuan  :  http://picta55.blogspot.com
   
                SOURCE  :  http://www.bigpicture.ru


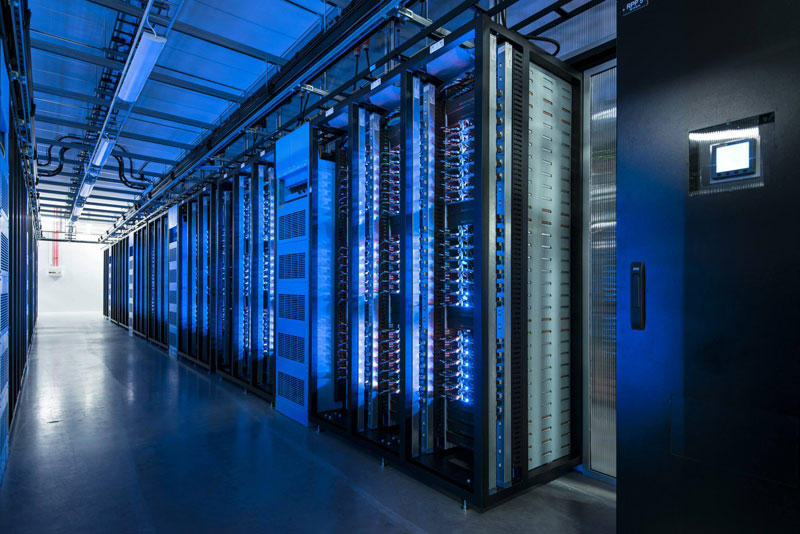
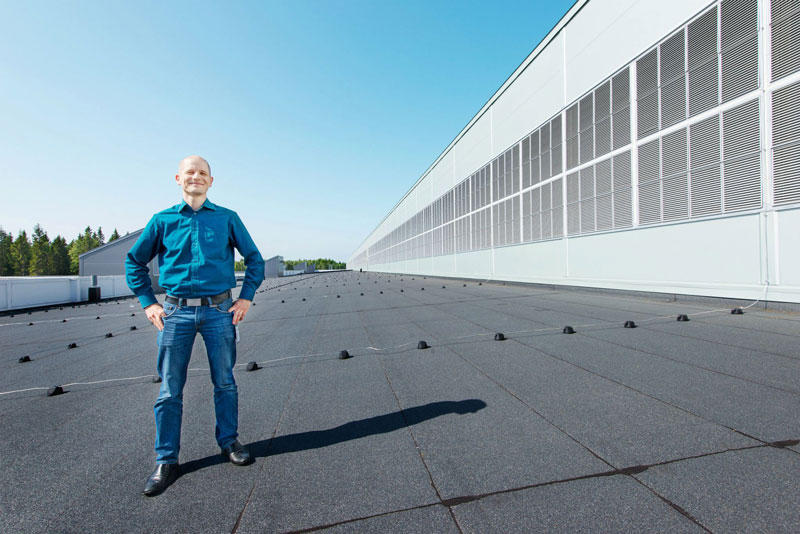
At the edge of the Arctic Circle in Lulea (Sweden) is the newest data center Facebook. The Center handles data about users of social networks around the world. 
 ชายขอบของเส้น Arctic Circle  (เขตอากาศหนาวเหนือ ตั้งแต่เส้นอาร์คติค เซอร์เคิล (Arctic Circle) ถึงขั้วโลกเหนือ เขตนี้ได้รับแสงเฉียงจากดวงอาทิตย์ปีละไม่เกิน 6 เดือน เป็นเขตที่มีประชากรอาศัยอยู่เบาบาง)  เมือง Lulea  ประเทศ Sweden เป็นศูนย์ข้อมูลแห่งใหม่ของ Facebook  ศูนย์ข้อมูลแห่งนี้เก็บข้อมูลของผู้ใช้เครือข่ายสังคอมออนไลน์จากทั่วโลก  (น่าจะรวมเด็กนักเรียนของเราด้วยแน่นอน เพราะเด็กเราชอบและใช้ Facebook กันมหึมามหาศาล จนอาจจะเรียกได้ว่า เป็นกิจวัตรประจำวันไปซะแล้ว)

BIGPIC26 Центр обработки данных Facebook возле Полярного круга 


FBDataCenter01 Центр обработки данных Facebook возле Полярного круга
1. Data center in Lulea became the first data center outside of the U.S..
ศูนย์ข้อมูลแห่งนี้ เป็นศูนย์ข้อมูลแห่งแรกของ Facebook นอกประเทศสหรัฐอเมริกา

FBDataCenter02 Центр обработки данных Facebook возле Полярного круга
2.
FBDataCenter03 Центр обработки данных Facebook возле Полярного круга
3. Facebook Guide believe that Lulea is likely to be one of the most efficient and sustainable data centers in the world.
Facebook เชื่อว่า ศูนย์แห่งนี้จะมีประสิทธิภาพ (efficient) และเก็บข้อมูลได้อย่างยั่งยืนสุดๆ(sustainable)

FBDataCenter04 Центр обработки данных Facebook возле Полярного круга
4.
FBDataCenter05 Центр обработки данных Facebook возле Полярного круга
5. All the equipment in the center provides electricity to the local hydroelectric power plant that runs on renewable energy, thus reducing the number of backup generators for more than 70%.
อุปกรณ์ทั้งหมดในศูนย์แห่งนี้ จะใช้ไฟฟ้าจากพลังงานสะอาด คือจากโรงไฟฟ้าพลังน้ำที่อยู่ในท้องถิ่น ซึ่งเป็น renewable energy (พลังงานหมุนเวียน)  จึงสามารถลดจำนวนเครื่องกำเนิดไฟฟ้าสำรอง (backup generators) ได้ถึงร้อยละ 70

FBDataCenter06 Центр обработки данных Facebook возле Полярного круга
6.
FBDataCenter07 Центр обработки данных Facebook возле Полярного круга
7. In addition to the energy of the water, the center is also used by the northern cold air to cool the servers that store photos, videos, comments and "likes." Any excess heat is used to maintain a comfortable temperature in offices. 
นอกจากพลังงานสะอาดที่ได้จากไฟฟ้าพลังน้ำแล้ว  ศูนย์ข้อมูลแห่งนี้ ก็ยังอาศัยอากาศหนาวที่พัดมาจากขั้วโลกเหนือช่วยระบายความร้อนจากเครื่อง Servers (เครื่องแม่ข่าย) ของศูนย์ฯ ที่เก็บรูปภาพ วิดีโอ และ comments และ likes ของผู้ใช้เฟสบุ๊คจากทั่วโลก  และที่สำคัญความร้อนที่เกิดจากการทำงานของระบบเหล่านี้ จะถูกนำไปสร้างความอบอุ่นในสำนักงานอีกด้วย (เพราะอากาศที่โซนนี้หนาวมากนั่นเอง ตามที่กล่าวแล้ว)
FBDataCenter08 Центр обработки данных Facebook возле Полярного круга
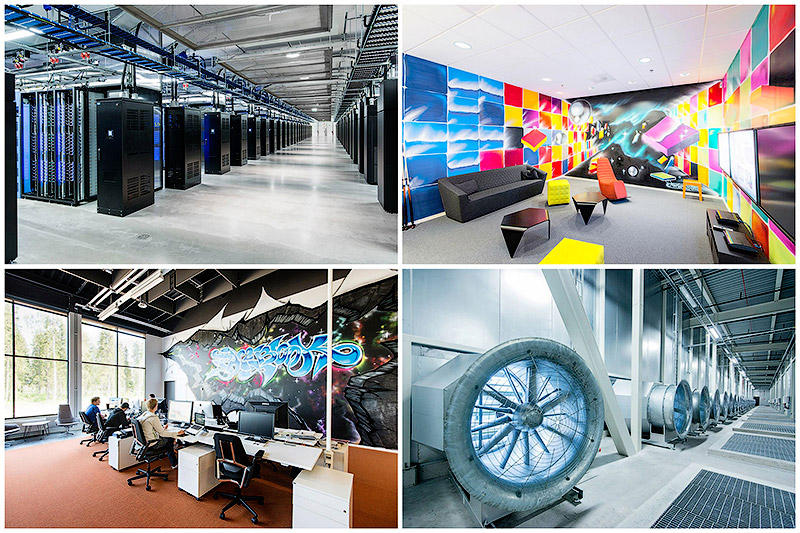
8. The so common office of them. 
    สำนักงานของพวกเขา ออกแนวธรมดาๆ บ้านๆ มากๆ 

FBDataCenter09 Центр обработки данных Facebook возле Полярного круга
9. Almost all of the technology at the center, from servers to power distribution systems, based on the work of Open Compute Project - community of engineers from around the world, which is engaged in designing storage centers.
เทคโนโลยีของศูนย์ข้อมูลแห่งนี้  ตั้งแต่เครื่องคอมพิวเตอร์แม่ข่าย (servers) ทั้งหลาย ไปจนถึงระบบการกระจายข้อมูล (distribution systems) จะทำงานอยู่บน Open Compute Project ซึ่งเป็นระบบเปิดที่ให้วิศวกรของระบบเฟสบุ๊กจากพื้นที่ต่างๆ ทั่วโลก สามารถเข้ามาใช้งานร่วมกันได้  

FBDataCenter10 Центр обработки данных Facebook возле Полярного круга
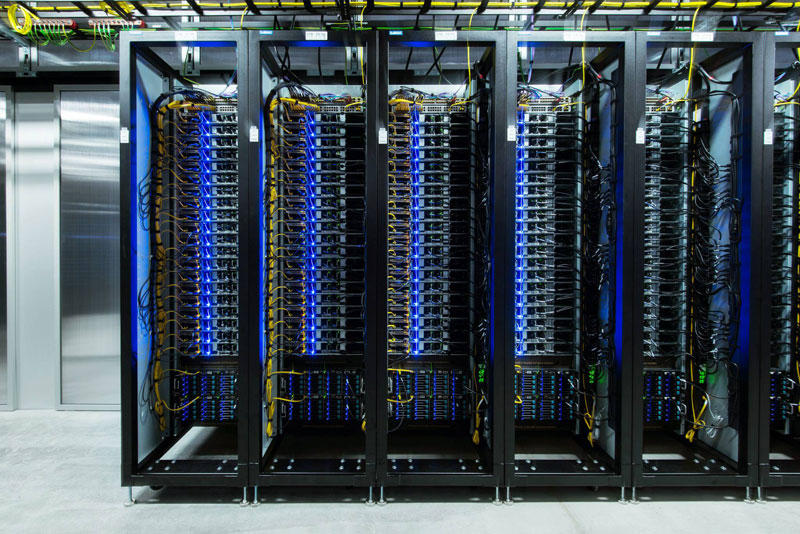
10. You can see the blue STP (Shield Twisted Pair) cables.
      สายสีฟ้านี่คือ สายเคเบิลแบบคู่บิดเกลียวและหุ้มฉนวน (กันสัญญาณรบกวน)

FBDataCenter11 Центр обработки данных Facebook возле Полярного круга
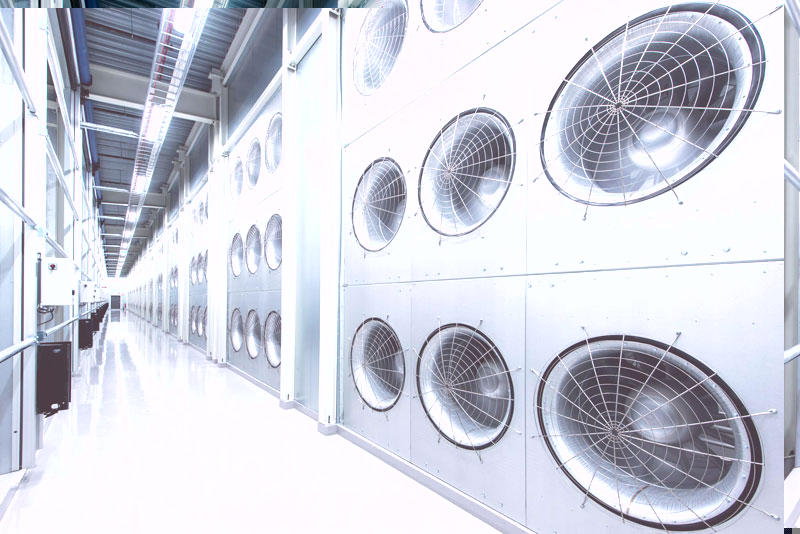
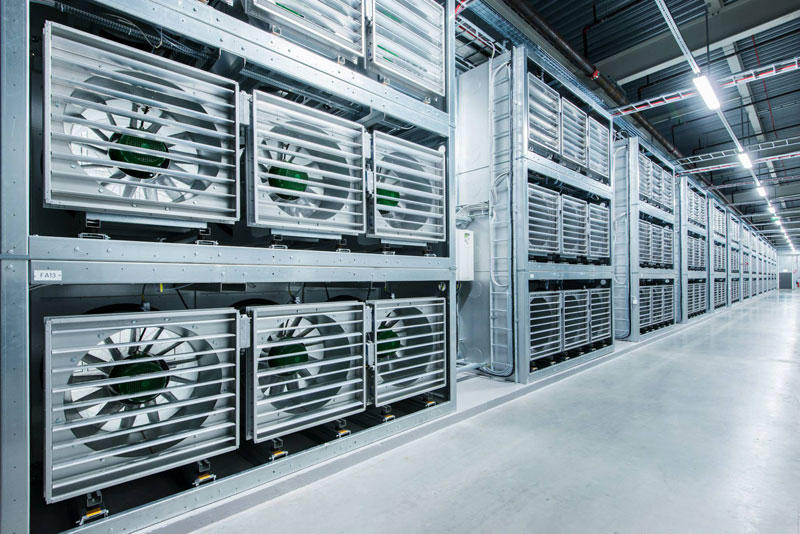
11.These are the ventilators. 
นี่พัดลมระบายความร้อนในระบบของพวกเขาล่ะครับ  มโหฟารบานตะโก้ซะขนาดนี้ รับรอง "เอาอยู่"

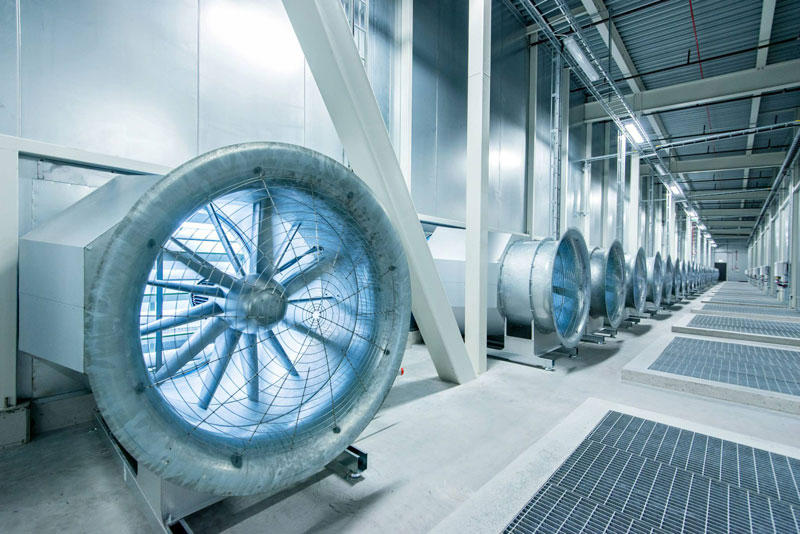
FBDataCenter12 Центр обработки данных Facebook возле Полярного круга
12. The ventilators can never work in the cold season.
พัดลมเหล่านี้ได้พักยาว ก็อากาศแถวเส้นอาร์กติกเซอร์เคิลมันหนาวเย็นเกือบตลอดปีนะสิ (ประหยัดพลังงานสุดๆ เลยนะ ศูนย์แห่งนี้)
 
FBDataCenter13 Центр обработки данных Facebook возле Полярного круга
13.These are their server computers. 
นี่แหละ หน้าตาเครื่องคอมพิวเตอร์แม่ข่าย (servers) ของเฟสบุ๊คที่คอยเก็บข้อมูล บริหารจัดการข้อมูลและสารสนเทศให้หมู่เฮาล่ะนะ


FBDataCenter14 Центр обработки данных Facebook возле Полярного круга
14.
FBDataCenter15 Центр обработки данных Facebook возле Полярного круга
15. During the first week of work, the coefficient of efficiency of energy consumption in the new center Facebook was 1.07.
ในสัปดาห์แรกของการใช้งาน the coefficient of efficiency of energy (ค่าสัมประสิทธิ์การบริโภคพลังงาน) เท่ากับ 1.07

FBDataCenter16 Центр обработки данных Facebook возле Полярного круга
16.
FBDataCenter17 Центр обработки данных Facebook возле Полярного круга
17.
FBDataCenter18 Центр обработки данных Facebook возле Полярного круга
18. The inscription on the wall of the center: "What would you do if you have nothing to be afraid of?"
คำจารึกที่ผนังกำแพงของศูนย์ "คุณจะทำอะไรดีเอ่ย ถ้าไม่มีอะไรที่ทำให้คุณกลัว?"

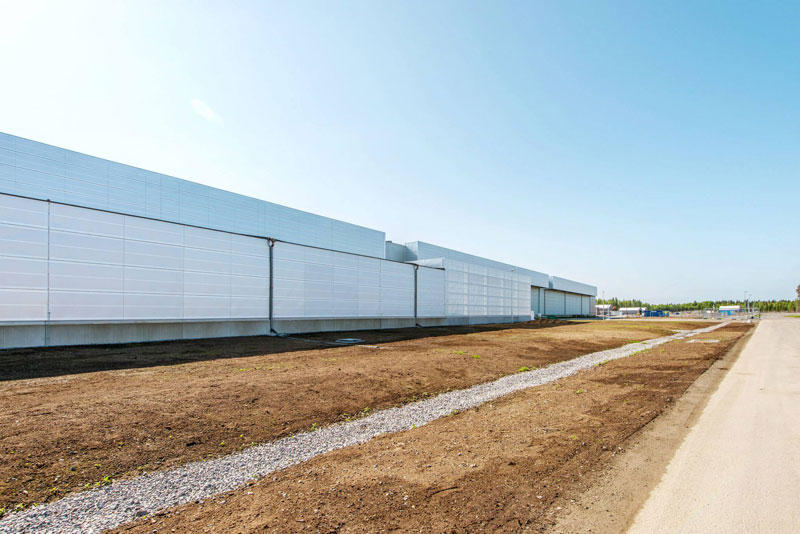
FBDataCenter19 Центр обработки данных Facebook возле Полярного круга
19. It looks like this in the summer, but on the other hand it is covered with heavy snow.
ที่เห็นเป็นอย่างนี้นะเหรอ ..เพราะมันหน้าร้อน (อันแสนสั้น) ของเขาอ่ะดิ ..เพราะปกติแล้ว มันจะขาวโพลนไปด้วยหิมะเกือบทั้งปี  

FBDataCenter20 Центр обработки данных Facebook возле Полярного круга

20. Center Manager - Joel Kelgren.  ผู้จัดการศูนย์